


Friday, March 29, 2013
Friday, March 22, 2013


Thursday, March 21, 2013
Get Earn Money from Adf.Ly
Adf.ly? Apa sih Adf.Ly itu? Merupakan sebuah website yang menyediakan service
mempersingkat sebuah URL yang panjang menjadi URL yang lebih pendek dan mudah
di ingat tentunya, contohnya seperti ini http://adf.ly/?id=3628524,
selain lebih mudah diingat, ternyata
bisa juga mendapatkan uang dollar dari setiap URL yang di singkat dan di sahre
link tadi ke teman atau di web iklan baris untuk promosiin sebuah URL dari link
affiliate untuk tambahan earning. Nah cukup mudah bukan..
Yang belum bergabung
silahkan daftar KLIK DISINI


Tuesday, March 19, 2013


Monday, March 18, 2013


Battleship Text Effect Using Photoshop Layer Styles
Step 1
Create a new document with dimensions of 1920 x 1280 pixels. Unlock the background layer and fill it with black, then apply the following Layer Style settings.
For the gradient, use #000000 on the bottom and #001E2D on the top.

This will give us a very subtle blue glow effect around the top edge. You should end up with something similar to the image below.

Step 2
Next we will create a glowing sphere in the center of our canvas.Create a new layer, fill it with black, and change the Fill to 0% in the Layers palette.
Apply the following Layer Style settings.

You should end up with something similar to the image below.

Step 3
To give our background a subtle smoky look, create a new layer, and with black and white set as your foreground and background colors in the bottom of the Tools palette, click Filter > Render > Clouds.In the Layers palette, set the blend mode of this layer to Overlay and the transparency to 25%.
You should end up with something similar to the image below.

Step 4
Now we will create a glowing horizon for our battleship to sit on. In a new layer, draw a black rectangle that is the size of the bottom half of your canvas, in our case, it is 1920 x 640. Move it so that it covers the bottom half of your canvas.Apply the following Layer Style settings.

Our gradient has consists of 3 colors, #000000 with the location set to 90%, #304550 with the location at 95%, and #FFFFFF with the location at 100%.

You should end up with something similar to the image below.

Step 5
Insert your battleship silhouette onto the canvas. We used one from the amazing (and free) Vector Navy Ships from all-silhouettes.com.Apply the following Layer Style settings, and position the shape in the center of your image with the bottom of the ship just below the horizon line.

You should end up with something similar to the image below.

Step 6
Now comes the important part. I spent a lot of time getting the text effect just right to match the real Battleship movie poster text.The font they used is a slightly modified version of ITC Machine, which is not free. You can use a similar, more affordable (or free if you choose), font called Liberator from the Lost-Type Co-op, which is an amazing "pay-what-you-want" type foundry.
Create your title text, and apply the following Layer Style settings.


The color used for the Color Overlay is #026AB2.

The colors and locations for the Gradient Overlay are as follows, from left to right: #FFFFFF at 0%, #5F5F5F at 30%, #FFFFFF at 77%, and #A7A7A7 at 100%.

The texture we used for the pattern overlay is metal texture 7 by wojtar-stock on Deviantart.


You should end up with something similar to the image below.

Step 7
Create your sub-header using the same font in a smaller size and apply the following Layer Style settings.The colors used in the Gradient Overlay are #495052 on the left, and #DAE1E3 on the right.

You should end up with something similar to the image below.

Final Image

Metallic Text Effect in Photoshop
Step 1
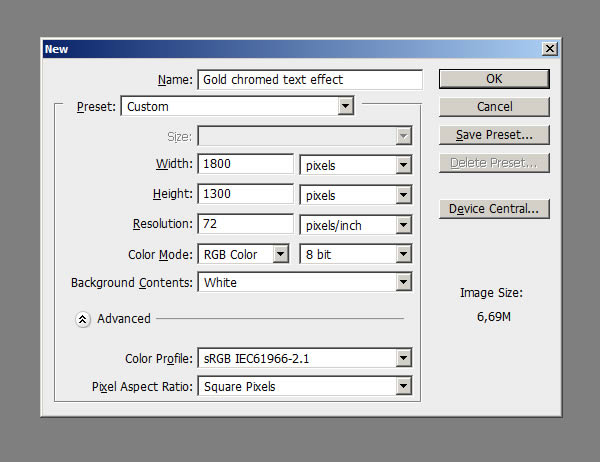
Before opening Photoshop, install the font Rothenburg Decorative and these grunge brushes.Open Photoshop and Create a New Document, 1800 x 1300 pixels in RGB mode, 72 DPI and finally then Fill the background with this dark grey color #1f1f1f.
Step 2
Create a New Layer, name it ‘texture’ and using these Grunge Brushes click a couple of times in the center of the document using a white color. Use different brushes, try to cover the center of the document, varying the textures.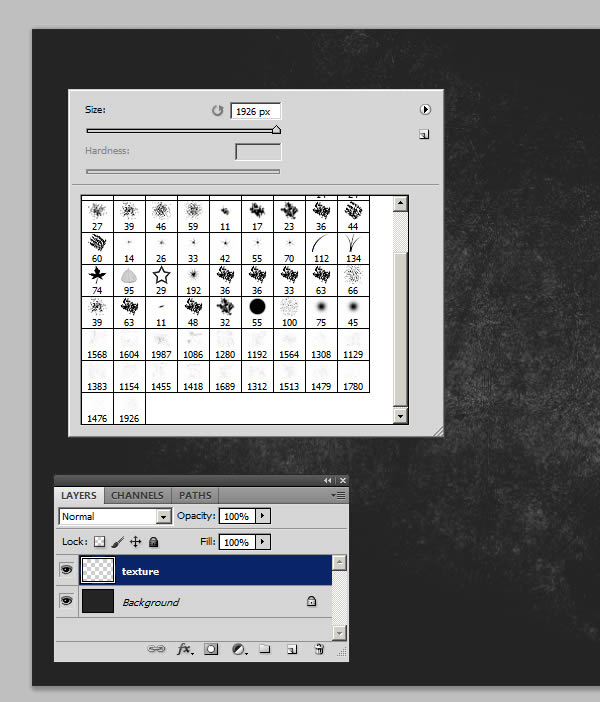
Step 3
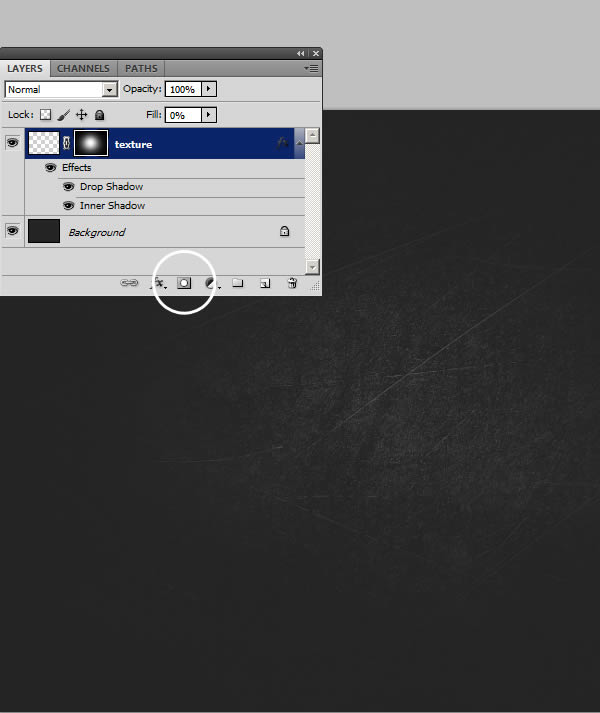
Double-click on the thumbnail of the Layer ‘texture’ to open the Layer Style panel. Into the ‘Blending Options’Reduce the ‘Fill’ to 0, then apply a ‘Drop Shadow’ and an ‘Inner Shadow’ using these settings. This will give the texture a realistic embossed look.

Step 4
Click on the ‘Add Layer Mask’ icon, then click Command/Ctrl + (I) to invert it.Pick a big soft Brush (hardness: 0% – size: 950px) and click in the center of the document. This way the ‘texture’ Layer will be shown only in the center, fading on the edges of the document.
Step 5
Using the ‘Type Tool’ (T) and these settings, type the word ‘Othello’ or whatever you want. If you can’t see the ‘Character Window" go to Window > Character.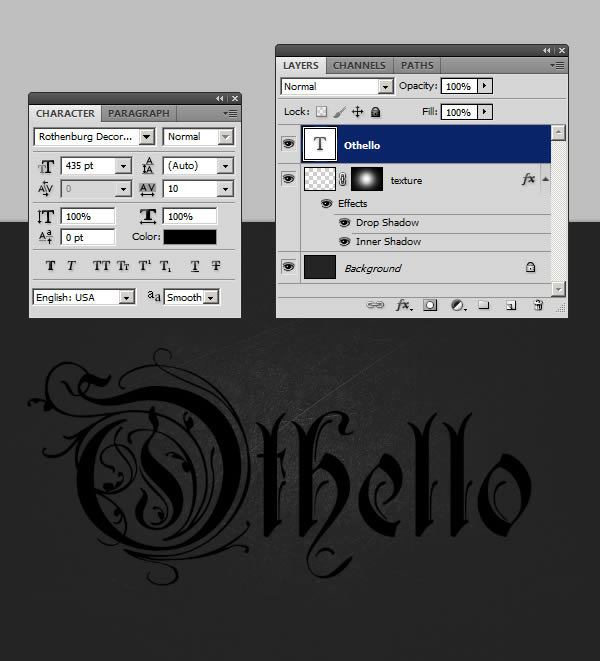
Step 6
Open the ‘Layer Style’ of the ‘Othello’ Text Layer and apply these settings. Below each step you can find a preview for the effect just added.
Step 7
Once you’ve modified the Style, click Ok. Now select the word ‘Othello’, using the Type Tool (T). Select everything beside the first capital letter and reduce the kerning to -5 as in the image below. You can find the Character Window under Window > Character.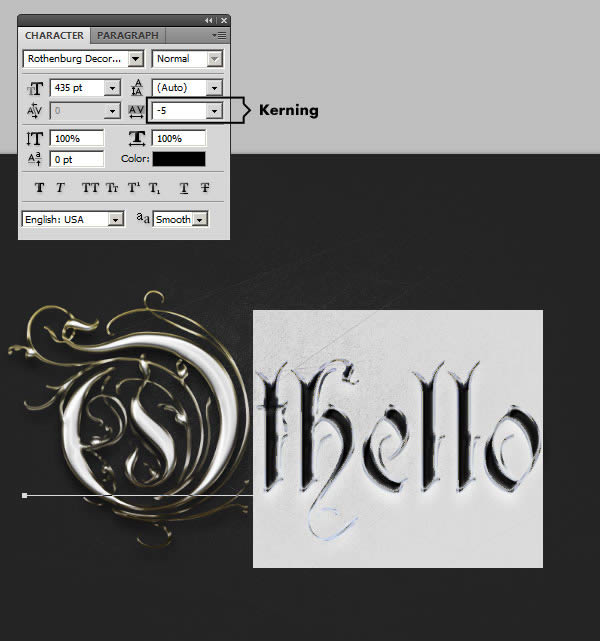
Step 8
Duplicate this Layer with Command/Ctrl + (J), right-click on the Layer’s thumbnail and choose ‘Clear Layer Style’. This way the text below matches exactly the one above, and now we can add more effects. My favorite way to work with 2 Layer Styles, is to create a solid base as we did to the first Text Layer, and then add lightings and reflections on the second Layer above. This way you can blend easier the lights and colors with the textures of the Layer below.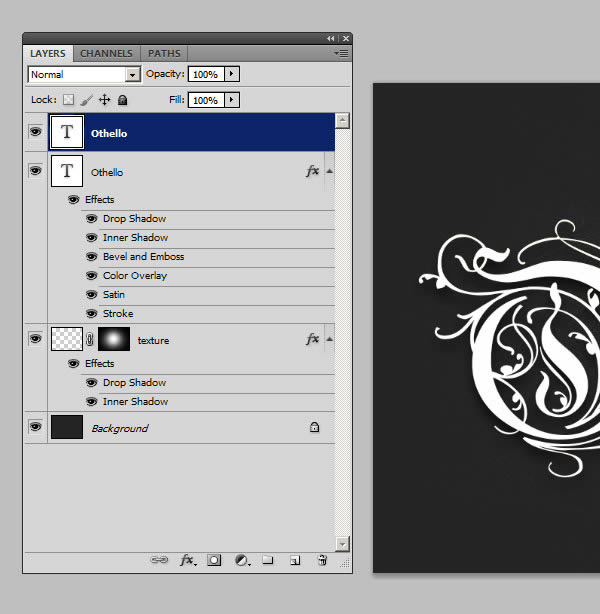
Step 9
Let’s go on, adding a Layer Style to this second ‘Othello’ Text Layer. Double click on its thumbnail to open the Layer Style panel. Set fill opacity to 0 in blending options.
Step 10
The effect is pretty much done, but we need to make it look crisp and realistic, in this final step. Take a look at the trick with the ‘Stroke’: dropping down it’s Opacity to ’0′ it works almost as a layer mask, hiding the Layer on its edges. A Stroke of 3px ‘Inside’, for example, will hide the Text for 3 px along the edges, revealing what’s below in that 3px range. Once you’ve finished with these settings, click Ok to apply the effect.
Conclusion
Remember that when you Save the final effect, as a jpg image for example, it may look different, sharper, and more defined overall.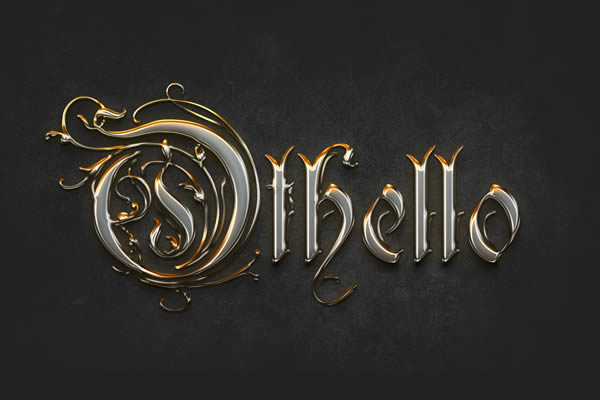
Subscribe to:
Posts (Atom)
